Progress Update: Adding a Bathroom & Laundry
I’ve fallen behind on posting our progress updates…way behind! But, now that we have a little extra time at home I thought I’d better get busy. Time to get off the couch and start sharing our progress.
Big job, bigger rewards
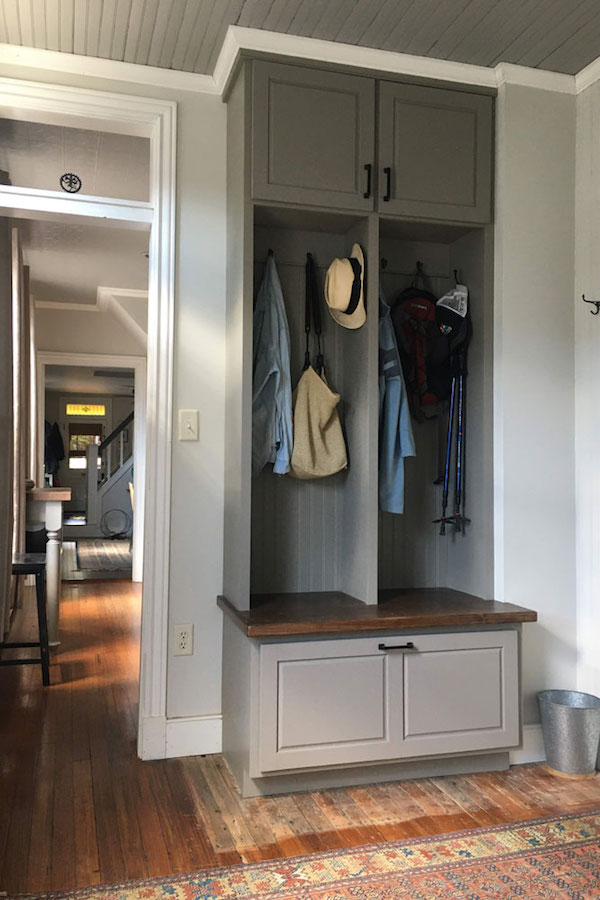
This project was one of the biggest, most costly we’ve tackled and the results have been so rewarding. Adding a full bathroom and laundry/mudroom on our first floor has really been a game changer for our comfort and day to day functionality of the house. No more navigating the narrow, rickety steps to the yucky old basement, to do laundry. Having a place to hang our coats, put away our bike helmets, shoes and boots is great. A modern walk in shower and bathroom is also pretty wonderful.
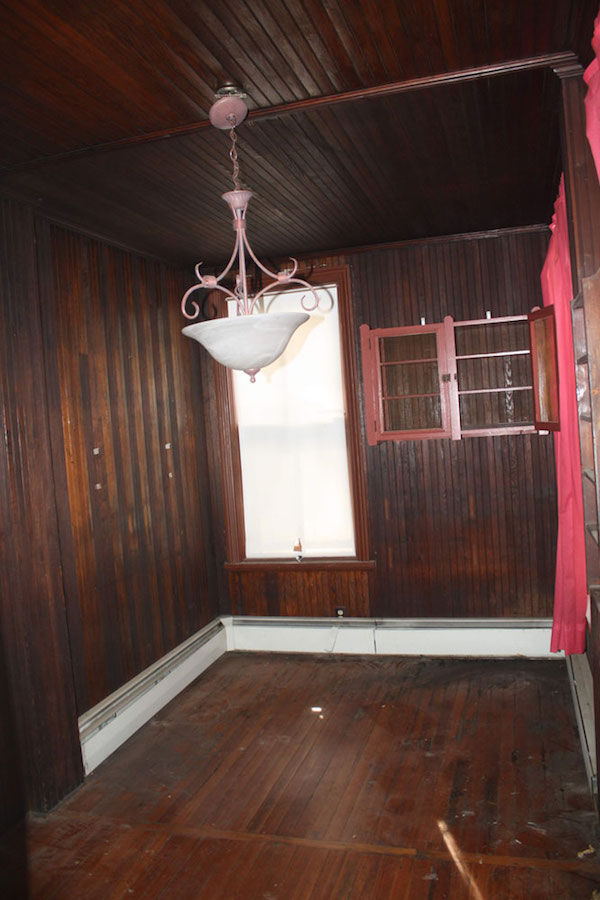
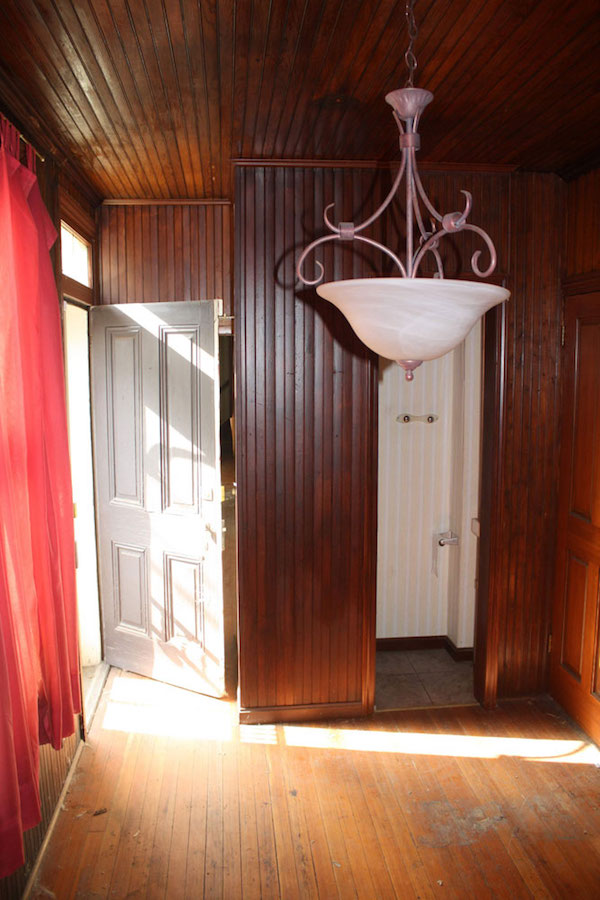
From the first time we walked through this house we knew we could make better use of the small dark paneled room behind the kitchen. It had quite possibly the worlds smallest powder room hidden behind a pocket door in a space that measured only 30″ x 57″. Think tiny airplane bathroom.
Looking back while looking ahead
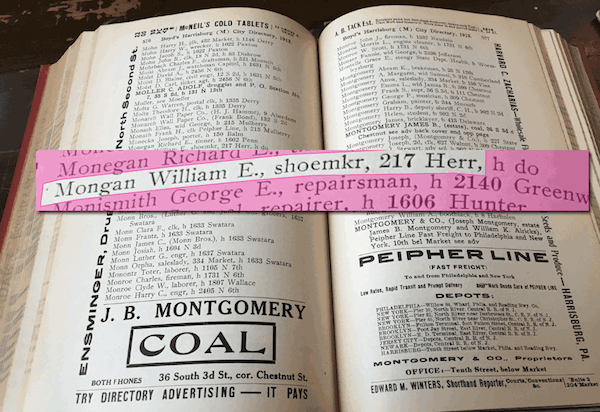
We think this was used as a cobbler (shoe repair shop) in the early days of the house. We verified that a cobbler once lived/worked here when we found a listing for William E. Mongan, shoemaker in the 1912 Harrisburg city directory. Sadly, we haven’t found any treasures left behind.
Working with what you have
This is a small space and we wanted to get the most function possible out of it. I spent a bunch of time on Pinterest and Instagram looking for inspiration…Ok probably way too much time – but you know how it goes, right? We had a general idea of what we wanted to do with the space. Marking everything out with blue tape really helped us visualize the layout and helped us discuss the project and get an estimate from our plumber. We’re super lucky that our plumber is willing to work with us, and our limited budget. Up front we discussed exactly what jobs we would tackle and what we would need him to do.

He gave us an estimate and his availability – so we were ready to start. We decided to work with the paneled walls and ceiling and left the windows and doors. We would decide on the floors once everything was installed. Eventually, we plan on updating the windows and external doors, but that’s down the road a bit.
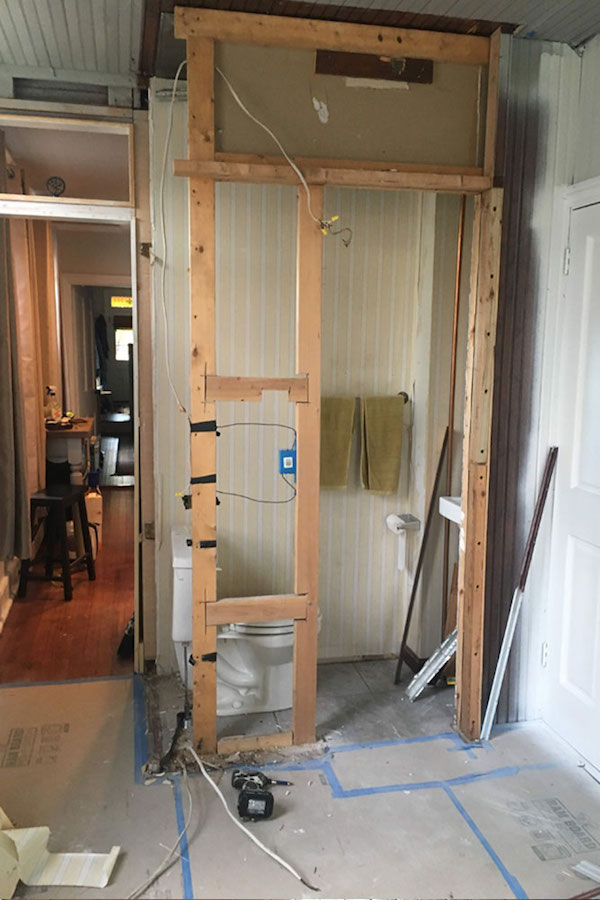
Out with the old
The tiny old 1/4 bathroom needed to come out as did the existing old baseboard heating units.
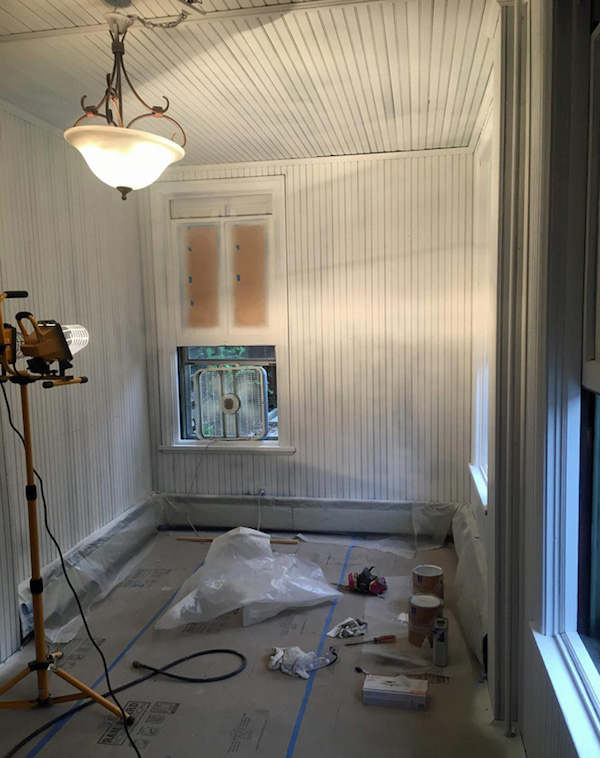
Time to sand, prime and paint
It took us a few days just to prep the room for painting. One piece of advice for painting paneling. Spend the time to sand and prep the surface properly, it will pay off later – trust me! Don’t skimp on the primer and use an oil based one.
Also, if you can get your hands on a decent paint sprayer do it. Painting all the little crevices and lines is maddening. The prepping can feel endless but if you mask and tape everything then the spraying goes more quickly, and the end results are worth the work.
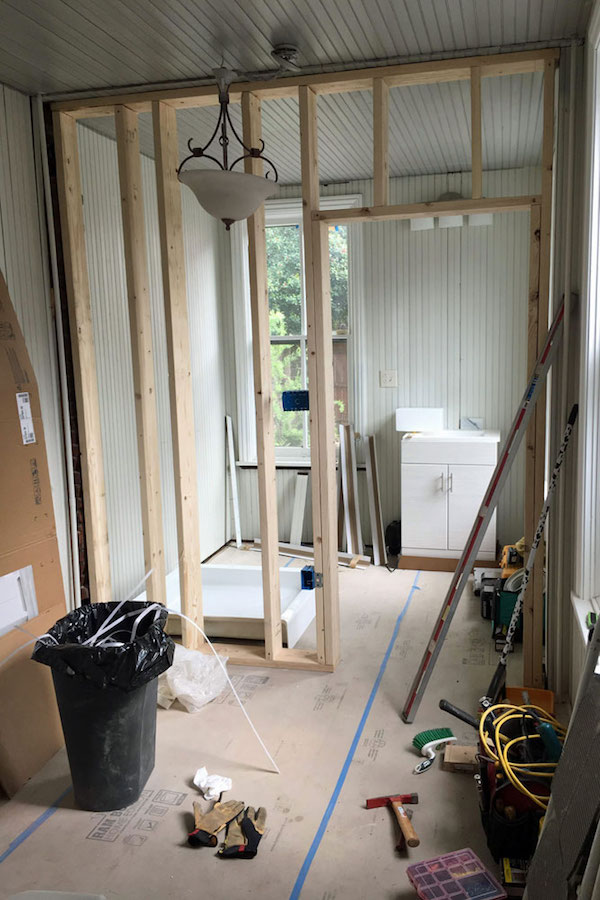
In with the new
Once the new wall for the bathroom was framed we were able to start placing everything based on our blue taped areas. This phase of the project is always exciting when you start to see your vision take shape and everything actually fits! Over the next severals weeks my husband worked hard to finish these two new spaces.
I’m not showing all the in progress photos here, let’s face it we all just really want to jump to the “After” photos. So here goes….
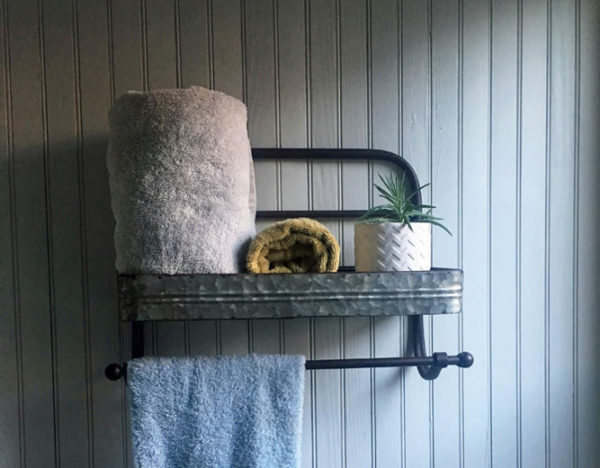
A new bathroom! Finally.
Since buying this house almost 4 years ago, we’ve known that the dark little room behind the kitchen would one day make a nice bathroom/laundry room. We had quite a few other projects to complete, just to make the house livable and then it took us sometime to save up the budget, but now that it’s done it was SO worth the wait!
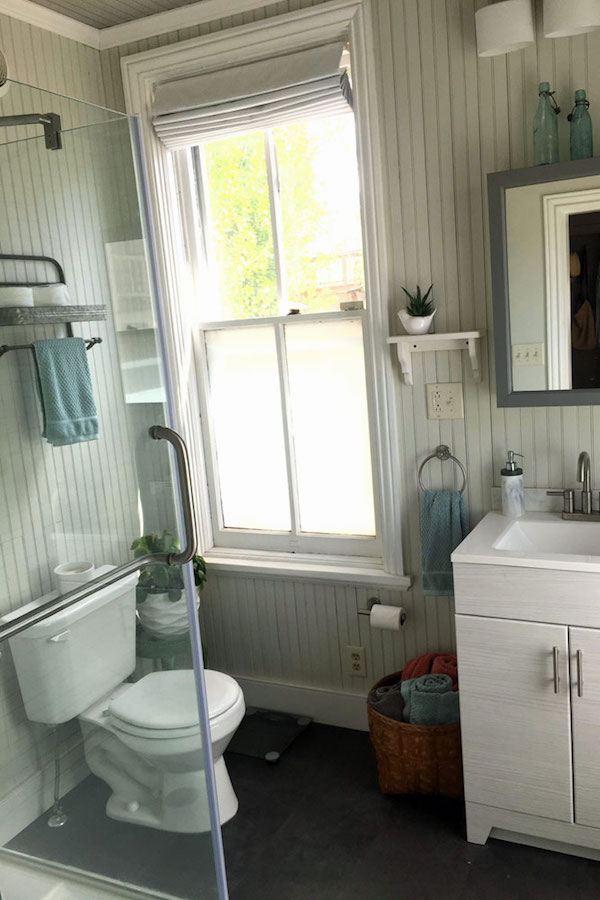
We decided to add a new floor to the bathroom and used a premium engineered vinyl. Because the space was so small we were able to purchase a higher grade product which was a real treat. We were able to reuse the existing toilet and we found a vanity at Lowes that will work for now. since the bathroom is on the first floor we added privacy film to the windows. I love how it keeps the room bright but also private.
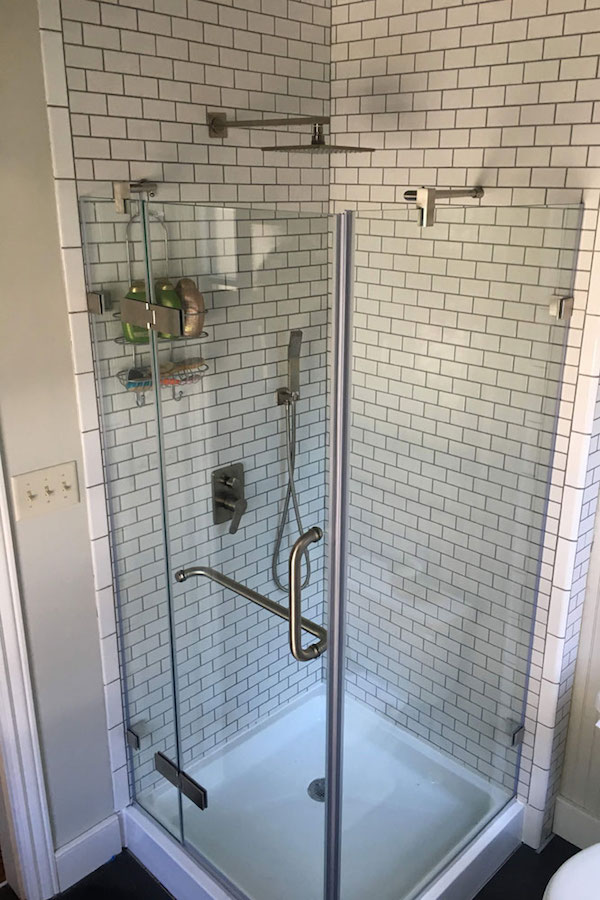
The shower walls and base were the most expensive feature, but since my husband did the tiling it ended up being within the budget. The original quote we had received to do this bathroom project when we bought the house was almost $9000! We were able to do this project for about half that amount including the new washer and dryer…woohoo!
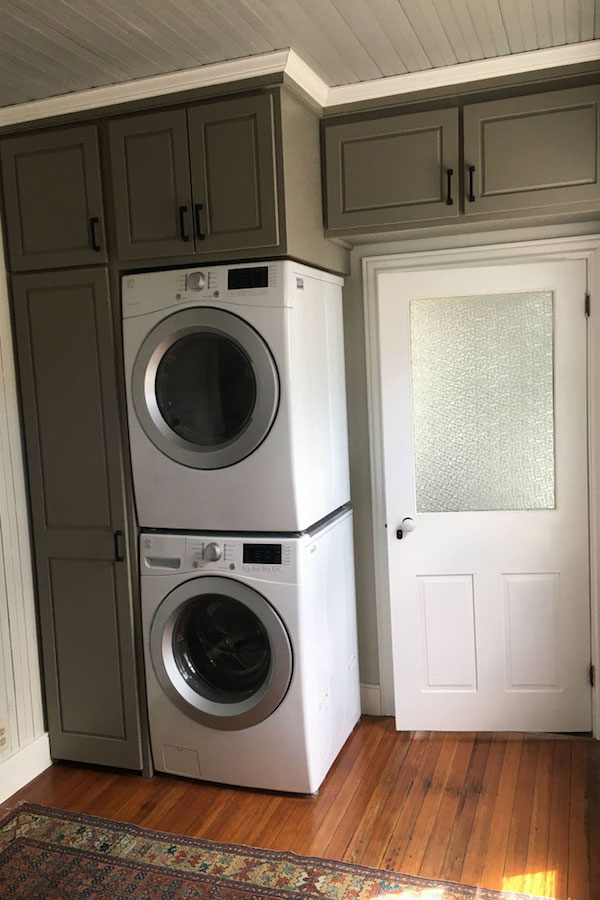
Having a laundry on the main floor of the house is so amazing. The new efficient stackable washer and dryer were from Sears and so far they have been great. Luckily my cabinetmaker husband was able to make custom storage cabinets all around, which really helps in an old house.
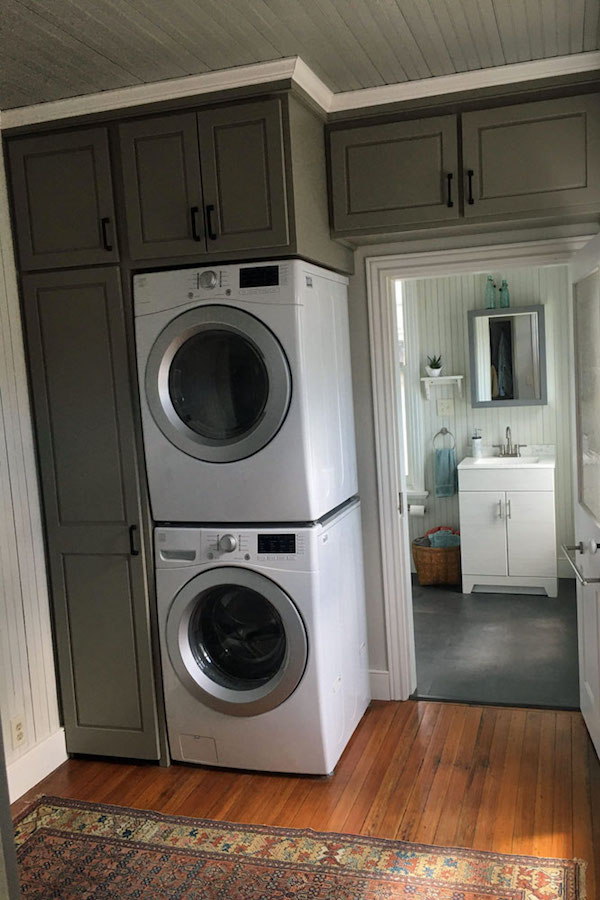
Hard to believe that the space where we now hang our coats and store our shoes used to be a very tiny toilet room. The outline of the old room is still visible on the floor so we’ll be working to fix that finish soon.
Quirky Character
Part of the charm of living in an old house is the quirky character. Some folks believe that renovations should really only be about restoring a house to it’s original state. I think that for some historic properties that may be true.
Our house has never been a fancy, high brow sort of dwelling. Looking at the early history indicates that it’s inhabitants were working class folks. The changes they made through the years made the house work for them. I’d like to think that the renovations we are doing now, to make this house a home for us, will also make it a comfortable place for future owners to live.
We have one more major room renovation to complete so stay tuned for more updates.

Beautiful! Love the colors you chose. Congratulations!