Progress Update: Guest Bedroom Renovation
During the last 4.5 years there were times when I wasn’t sure we would ever get to this point in our renovations. The stay at home quarantine provided us a focused amount of time to buckle down and finally renovate the last room in our house – the guest bedroom!

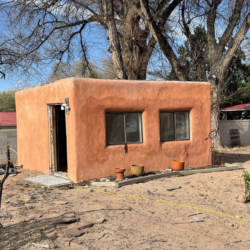
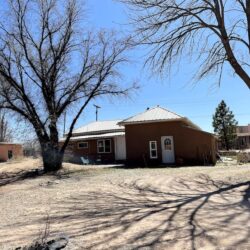
This room is on the 3rd floor and although it looks grim in the before photos it was the best room in the house when we first moved in. Yep, that gives you an idea of how bad things really were. If you want to see the rough before photos have a look at our photos from the original tour. We need to look at these every now and then to remind ourselves of how far we’ve come. If you are living in the midst of a renovation I highly recommend you do the same. You’ll feel so much better about your progress.
The dirty details!
As usual with this house the walls and ceiling were covered in layers of old wallpaper and paint. It took us a few days but we managed to get it all off. What a literal pain in the neck, arms and shoulders that was.
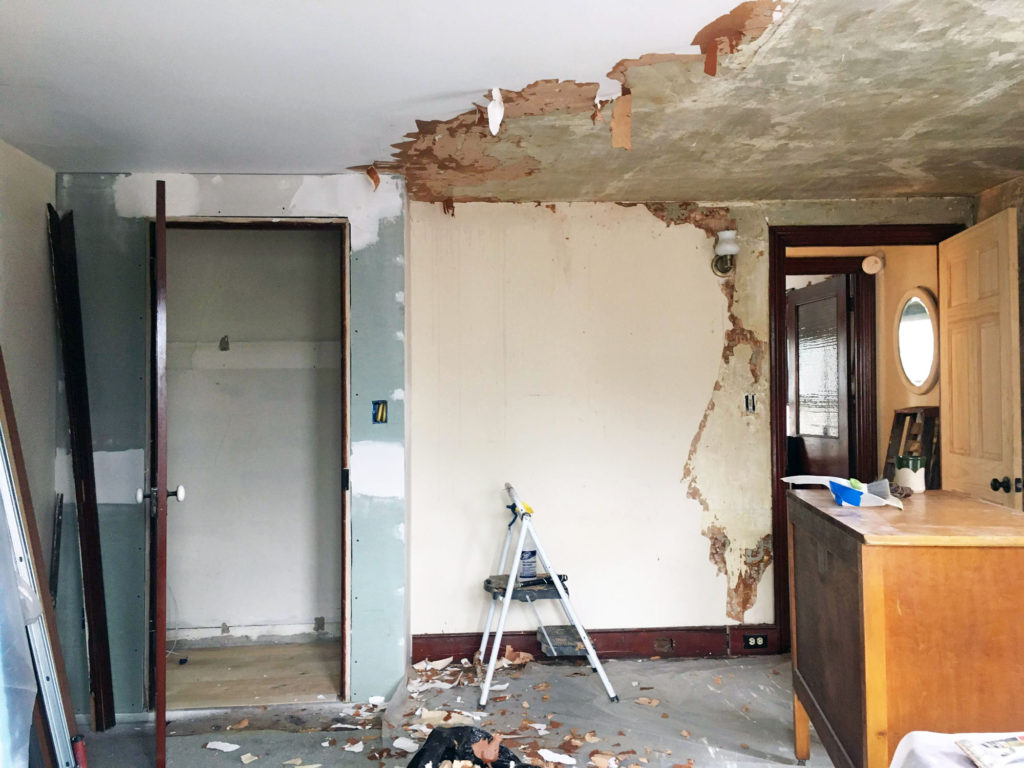
Luckily, the plaster underneath the wallpaper wasn’t in bad shape. It just needed a good scrubbing and some minor repairs.

However, the ceiling was a bit of a mess. There was a large crack and the plaster was pulling away from the lath. Good thing we’ve had plenty of practice fixing this issue. It turned out really nice and we know the ceiling is safe and secure.


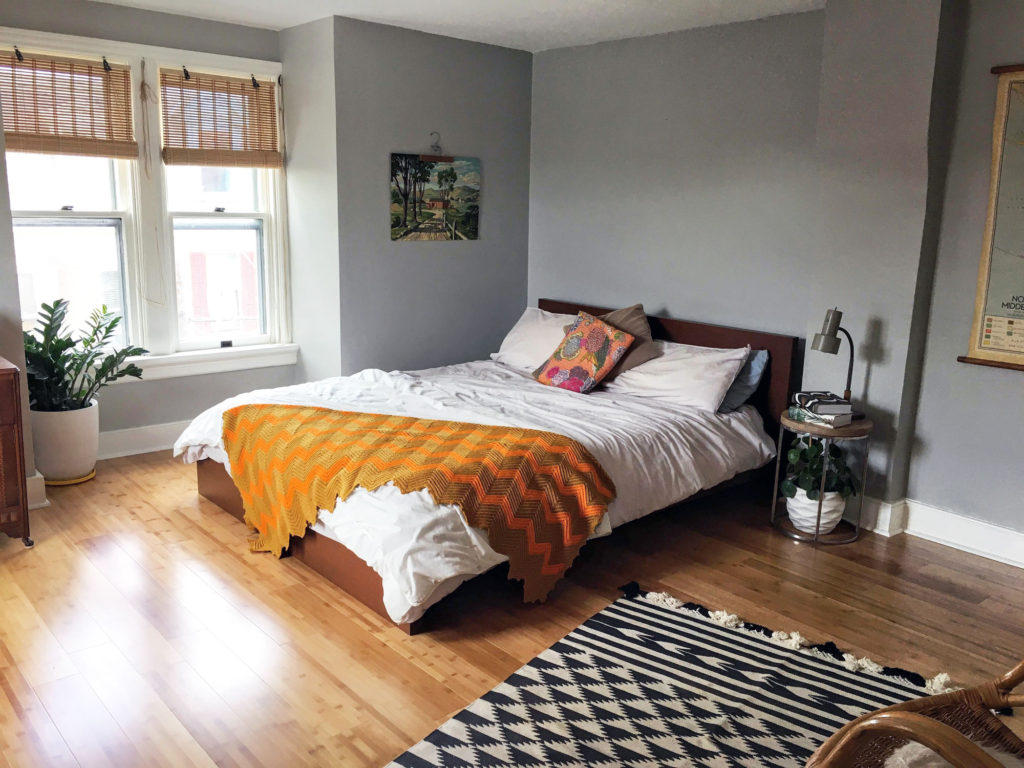
We needed to rip out the old carpet – which was thrilling for me – I’ve hated that carpet for 4.5 years! We installed a new bamboo floor and love the results. Painting the woodwork white makes another big impact. At first we thought we’d leave them brown, but on closer inspection they had been painted not stained and the wood was nothing special – so we sanded, primed and painted.

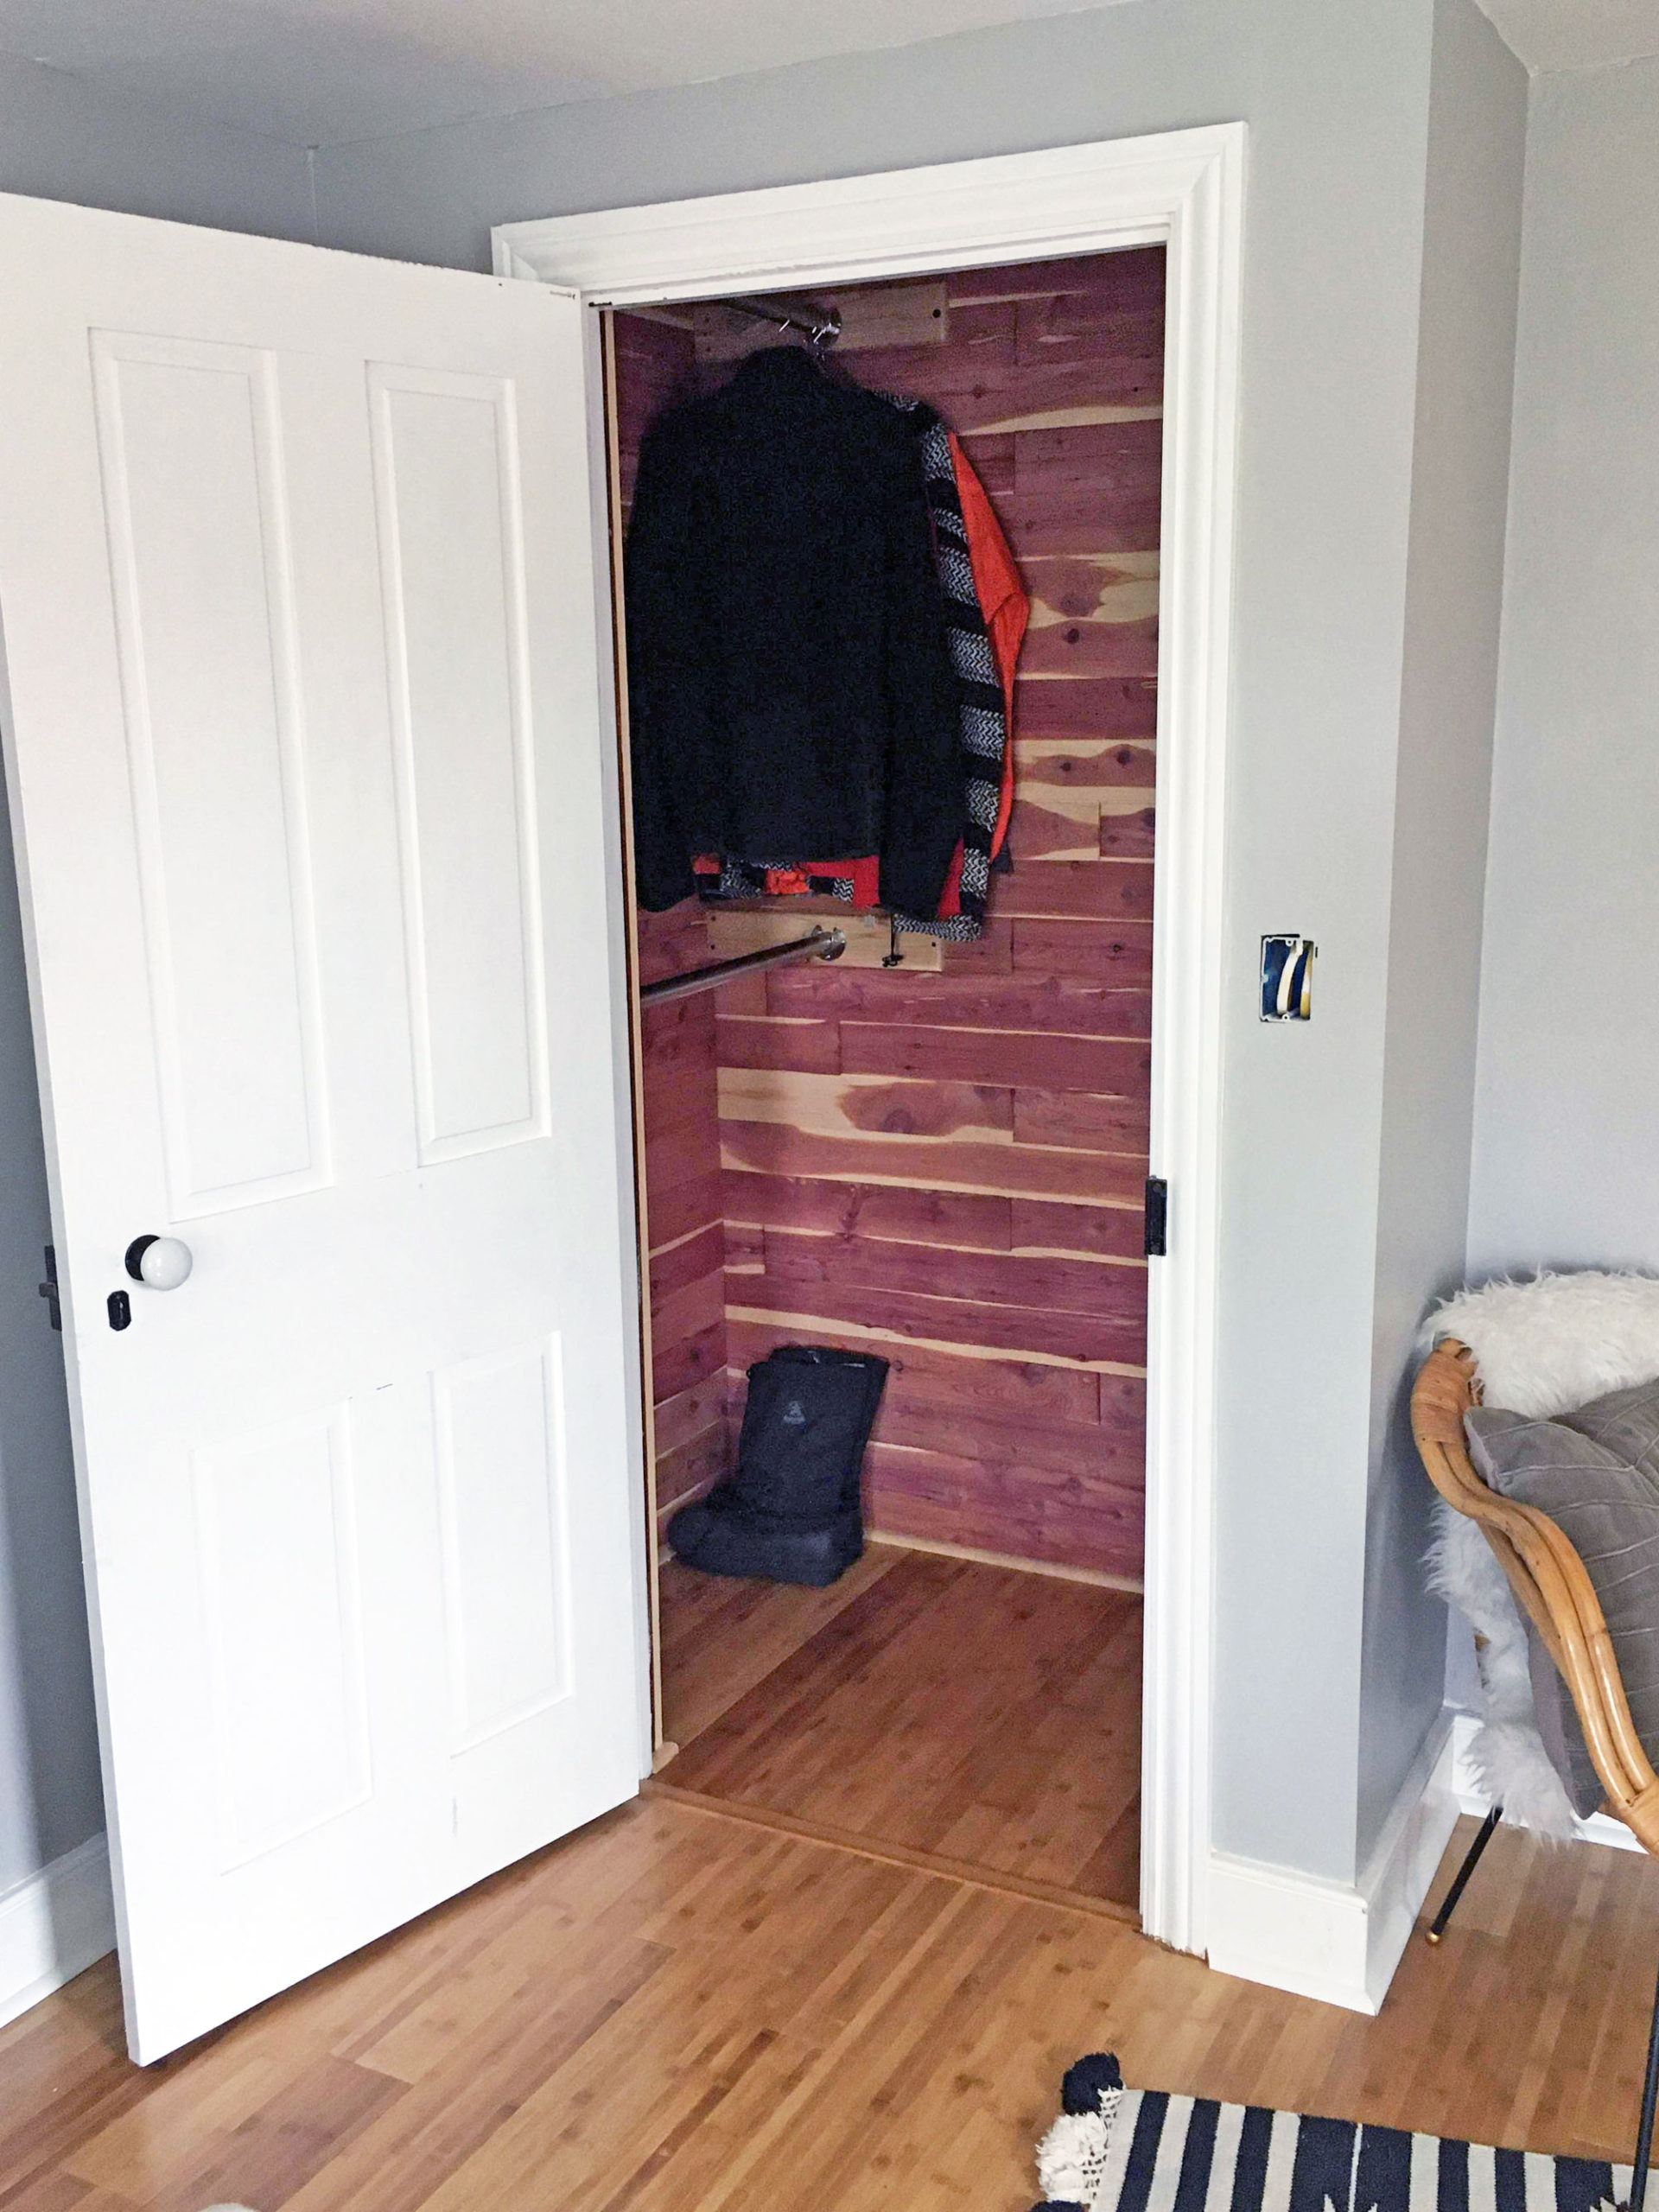
The closets in our 3rd floor rooms are very shallow. I guess folks in the 1800’s didn’t have a lot of clothing and stuff to store.

We decided to rip this old closet out and build a new larger cedar lined one with storage shelves and lighting.

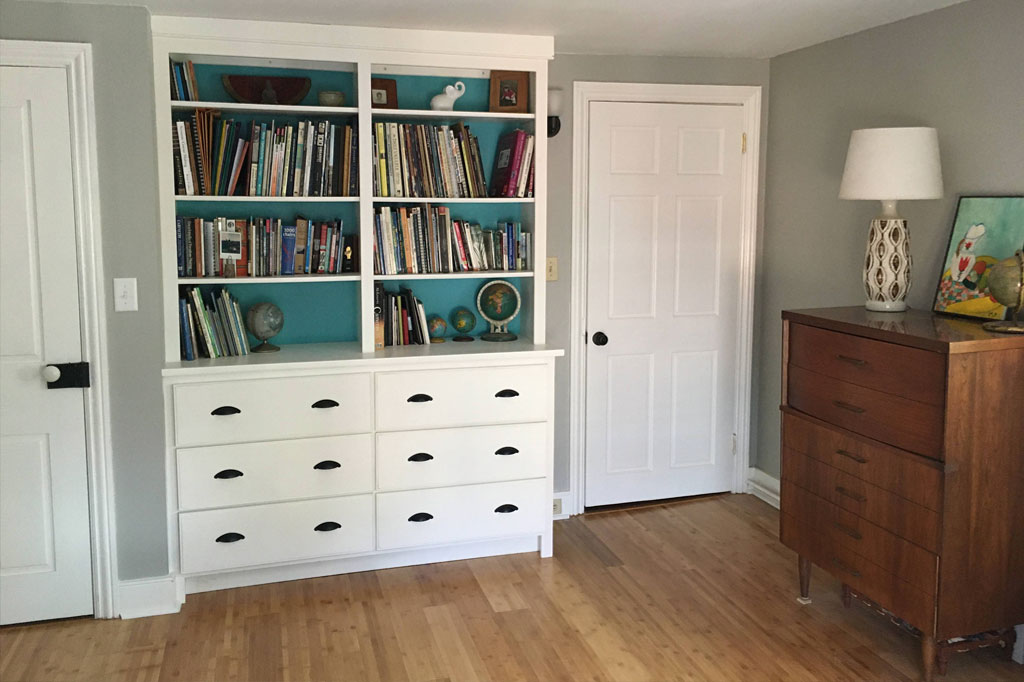
The wall next to the new closet will eventually be getting built in cabinets and books cases.
UPDATE! here is the final wall with custom built bookshelves – made by my husband.
Having lived most of our lives in older homes, closets can really be a big deal for us. We have renovated 4 other closets in this house, and each time we appreciate the improved functionality. Gotta love a nice closet!
Last but not least
Finally, the stairway leading up to the 3rd floor was always an eyesore.

This stairway is not only steep and narrow but the ceiling plaster was falling down and the wood steps really looked bad. These aren’t great photos but you get the idea. Once the ceiling was fixed, we sanded, primed and painted the steps and installed the bamboo flooring on the landing.
Are you done yet?
We get asked this question quite a lot. I’d like to say, now that the guest bedroom and the hallway have been renovated, that we are all done. But, if you live in an old house there is always something to do.
So…stay tuned – I’m sure we’ll have more renovation adventures to share in the future.